
Scan compression is a feature of PaperCut MF’s Document Processing that helps reduce the file size of scanned PDFs—great for saving storage and speeding up uploads.
It’s especially handy for Scan to Email actions, where attachment size limits often apply.
When using Document Processing features like OCR, blank page removal, or page splitting, the scanned file is first converted into PNG images for analysis. The pages are then reassembled into a PDF. This process can increase the file size, since some device-level compression is lost.
To help with that, PaperCut MF Document Processing can apply scan compression as a final step—shrinking the file back down after processing is complete.
Configure Compression
To configure compression:
- Log into the admin interface of the PaperCut MF server.
- Navigate to Devices then Scan Actions.
- Choose the Scan Action you want to edit.
- Scroll down to the Document Processing section.
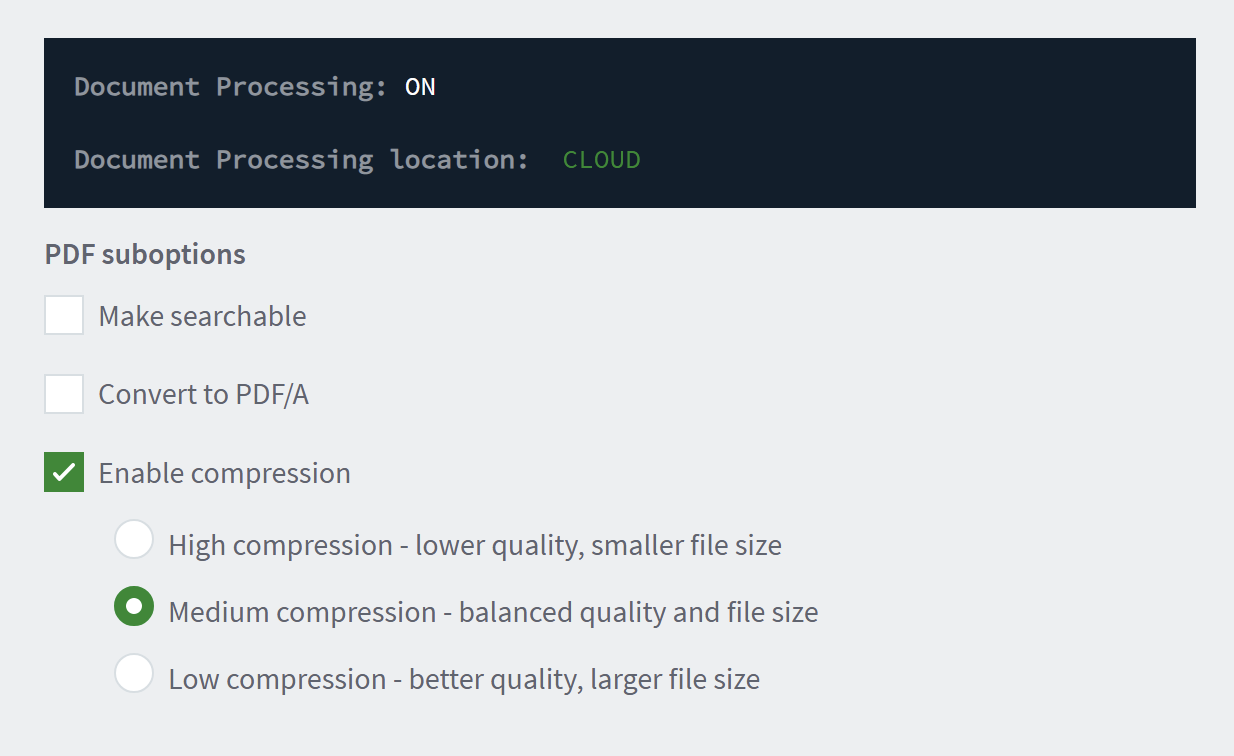
- Check Enable compression.
- Select a compression option:
- High compression for smaller file size and lower quality.
- Medium compression for balanced file size and quality.
- Low compression for larger file size and better quality.
Compression level recommendations
Choose your required compression level based on the specific needs and requirements of your use case. If image quality is essential or if the image needs to be edited or manipulated, no compression or low compression might be the better choice. However, if file size and transmission speed are the main considerations, compression might be more suitable.
PaperCut MF offers these 3 compression levels for scan output PDFs:
- Low compression - minimize the downsides of lossy compression (detailed below)
- Medium compression - trade off between file size and image quality
- High compression - smallest file size, poorer quality text and images
All of these compression levels use lossy compression.
In general, choose Low compression to minimize the downsides of lossy compression detailed above, and Medium or High compression if file size is your greatest concern.
Here are some use cases:
- When the document contains images or graphics with fine details, select low compression to preserve the visual clarity of the document.
- When the document needs to be printed, select low compression to ensure that the document prints with high quality, especially if it contains graphics, images or text with small fonts. If a PDF with high compression is printed, the output quality may suffer.
- When the document needs to be edited, select low compression because the PDFs are often easier to edit than highly compressed PDFs, especially if the document contains images or graphics. High compression can lead to artifacts or errors when editing the document.
- Email attachments can have size limits, so using high compression PDFs can help you send large files as attachments more easily.
Overall, deciding on which PDF compression level to use for scanned documents depends on your specific requirements and intended use of the PDF document. Always consider factors such as image quality, print quality, editability, security, and archival value when making this decision.
Compression is not recommended if you need to preserve the quality of sensitive documents for future reference e.g. legal documents, patient records.
Lossy compression technology
To prioritize file size reduction, PaperCut MF uses lossy compression. Lossy compression suits a variety of situations where file size is a primary concern, and the quality of the document can tolerate some loss of detail or information.
Lossy image compression is a method of reducing an image’s file size by selectively discarding some of the image data. It removes information that is less important or perceptually less significant, such as high detail or color information that is outside the range of human vision.
Lossy compression advantages | Lossy compression disadvantages |
|---|---|
|
|
Comments