This section covers the installation of the PaperCut User Client on Apple Mac systems. Before installing the client software, review Mac printing in detail and first ensure printing is working as expected.
The PaperCut Mac User Client software is a supplied as a native Mac .app package named PCClient.app
Simple install
This installation process involves copying the PCClient application from the PaperCut Application Server (which you will need access to), into the local Mac’s /Applications folder.
One way to access the PCClient.app is to connect to the PaperCut Application Server’s pcclient share over the network, however, alternate methods such as copying the folder contents via a USB key or shared drive are also possible.
If you’re the IT administrator you can find the macOS client app on the PaperCut Application Server, under [app path]/client/mac. Note that you can also use this method through MDM (device management) software or scripting to copy the PCClient.app to the Mac devices /Applications folders in bulk.
To install the Mac User Client from the App Server’s pcclient share:
-
Start and Log in to the Mac computer. Ensure it’s connected to the network.
-
Open the Finder.
-
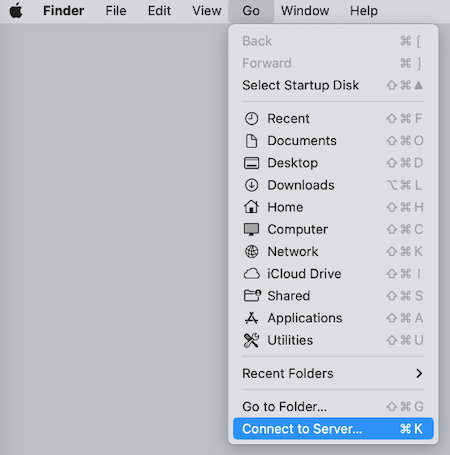
In the Go menu, select Connect to Server.

-
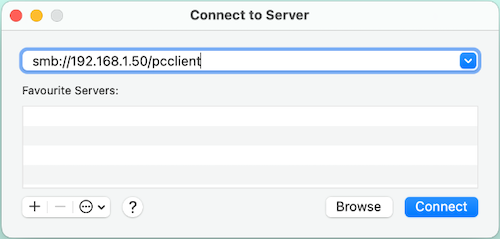
Enter the pcclient share’s connection details, such as:
smb://server_name/pcclient. Note thatserver_name(or the IP address in the screenshot below) is the IP address or hostname of your PaperCut Application Server.
-
Enter password information if requested.
-
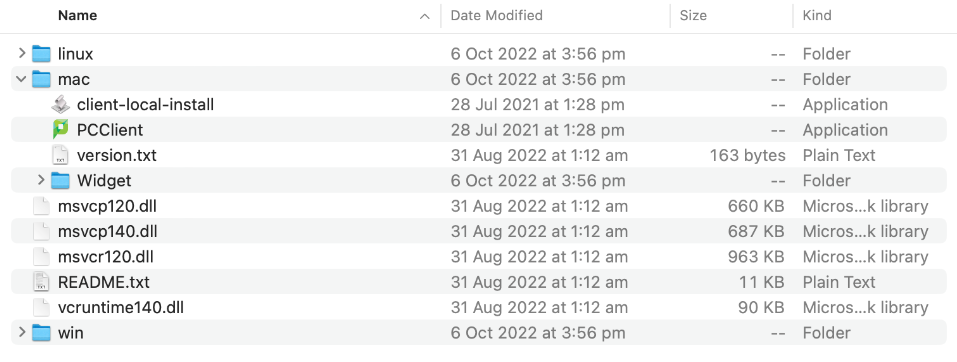
Open the
macfolder (shown below in the screenshot).
-
Copy (drag) the
PCClientapplication from the server share, over to the local/Applicationsfolder on your local system.- Alternatively, you can double-click the
client-local-installfile. This executes a small AppleScript program that starts the install/copy process (automatically copies the PCClient application over to your local/Applicationsfolder).
- Alternatively, you can double-click the
-
Test the application by double-clicking the
PCClientapplication icon in the system’s localApplicationsfolder. The PCClient application should start up, and a small ‘P’ icon should appear in the menubar.
Automatically starting the client
If the user needs the User Client for printing (for example, to use the shared account popup), configure the application to automatically open upon start up:
-
Open System Settings from the Apple menu.
-
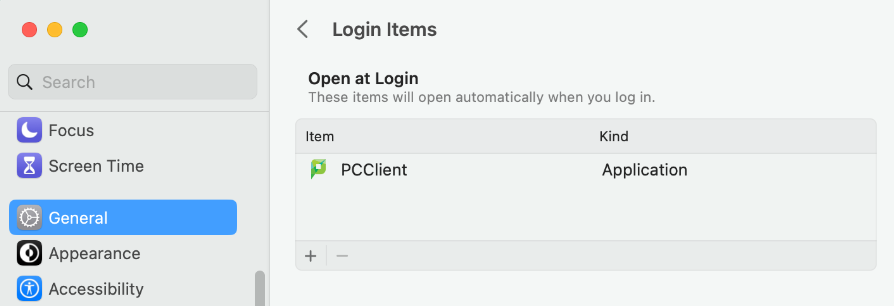
Select General > Login Items and look for the Open at Login section.
- Note that on older versions of macOS you may have to go into System Preferences > Accounts, then select your login name and finally select the Login Items tab.
-
Click
+then browse and select thePCClientapplication (which should now be under your local/Applicationsfolder).
See Apple’s Open items automatically when you log in on Mac article for more information.
-
Test by restarting the computer. The client should start automatically after the reboot and log in procedure is complete.
Client installation video
For a video walk-through of installing the macOS PaperCut User Client app and configuring it to auto-start on login, take a look at the video below:
Automatically starting the client using a LaunchAgent
If you’re not wanting to use the simple Add to Login Items method above, for Macs running 10.7, 10.8, 10.9, 10.10, 10.11, and later, an alternative way to get the PCClient.app auto-starting is to use LaunchAgents managed by LaunchD. This can also be helpful when deploying clients to multiple machines through MDM software or scripting bulk updates of machine software.
For more information on this, see our Starting the Client on MacOS with Launchd article.
Legacy macOS / Mac OS X information
While the above ‘Simple install’ documents the simplest way to get the PCClient up and running, there are some legacy methods that can be used as below.
On older PaperCut Application Server installations, there are two versions of the Mac client:
-
The current client, which supports everything from Mac OS X 10.7 (Mountain Lion) and later - up to the most recent macOS versions.
- The current client is found on the PaperCut Application Server in
[app-path]/client/mac.
- The current client is found on the PaperCut Application Server in
-
The legacy client, which supports Mac OS X versions from 10.4 to 10.6. It is a universal application that runs on both PowerPC and Intel hardware. The legacy client will not receive future feature enhancements.
- The legacy client is found on the PaperCut Application Server in
[app-path]/client/mac/legacy. The legacy app can be installed or copied to a device’s/Applicationsfolder in the same way as the current client, referenced above in the ‘Simple install’ section. - The legacy client software works best if Java 5 (or higher) is installed. Java 5 is available for OS X 10.4 or above. If Java is not already installed, the installer is available from the Apple website. This simplest way to install Java is to run /Applications/Utilities/Java Preferences from OS X Finder, and you are prompted to complete the installation.
- The legacy client is found on the PaperCut Application Server in


Comments