-
Click the Options tab. The General page is displayed.
-
In the Web Cashier area, click Go to Web Cashier setup.
The Web Cashier page is displayed.
-
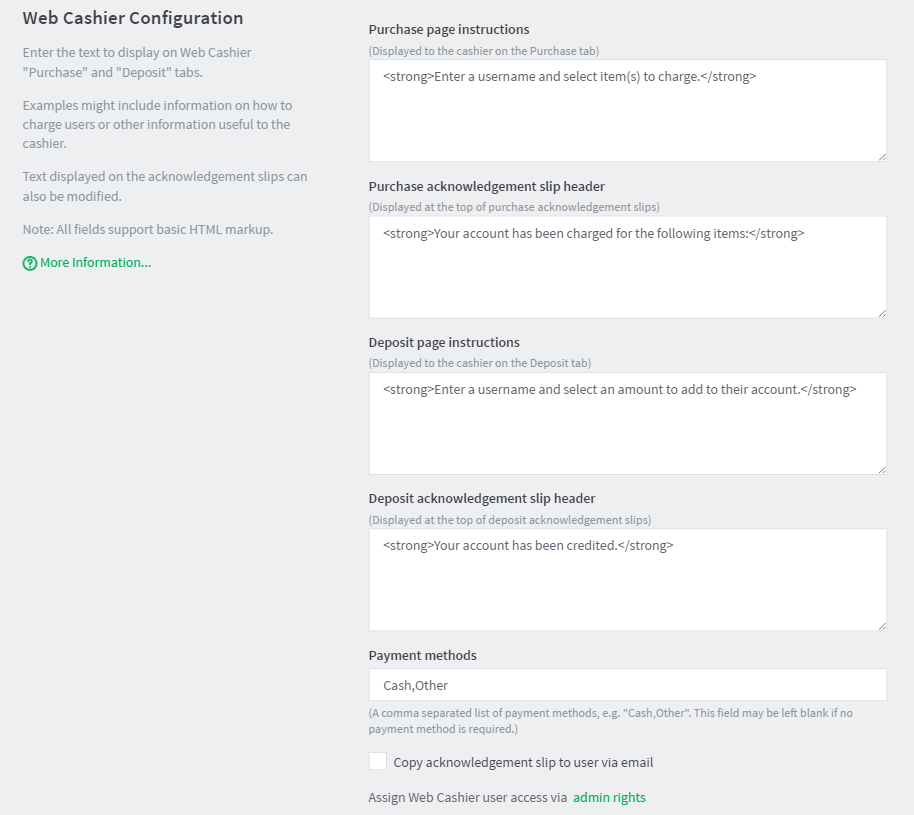
Configure the following configuration settings as required:
- Purchase page instructions—This text is displayed on the Web Cashier Purchase tab. It might include information on how to charge users. It supports basic HTML markup.
- Purchase acknowledgment slip header— This text is displayed on top of the Web Cashier Purchase acknowledgment slips. It supports basic HTML markup.
- Deposit page instructions— This text is displayed on the Web Cashier Deposit tab. It might include information on how to charge users. It supports basic HTML markup.
- Deposit acknowledgment slip header—This text is displayed on top of the Web Cashier Deposit acknowledgment slips. It supports basic HTML markup.
- Payment methods—This is a comma separated list of user-defined payment methods used for crediting users’ accounts. (i.e. Cash). It can be left blank.
- Copy acknowledgment slip to user via email— Select this option to send acknowledgment slips to users via email. To set up an SMTP server, see Set up system notifications and emails .
-
Click Apply.
Customize the Web Cashier interface text
Last updated September 30, 2025


Comments