A zone is a location defined by an IPv4 address range, for example, an office, branch, or campus. It also includes user groups to help define who can access the printers in that zone.
By default, Print Deploy has one zone - called Everyone - that deploys print queues to all computers and all groups in the network. You can add as many of your own zones as required.
Step 1: Add a zone
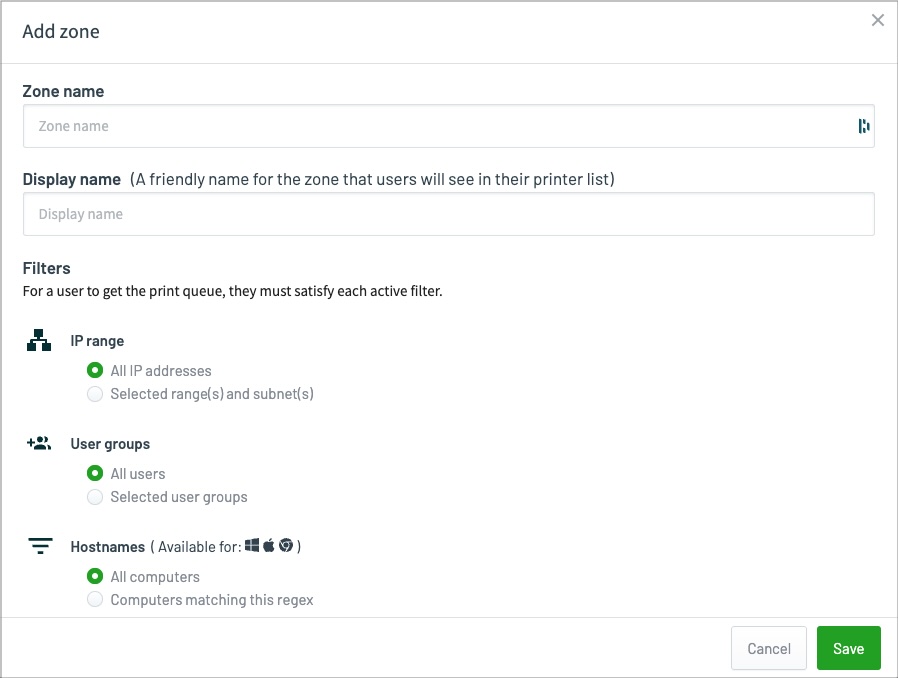
To start, in PaperCut MF go to Print Deploy (Enable Printing > Print Deploy) and click Add zone. The Add zone popup is displayed:

- In Zone name, type a name that clearly reflects, from a SysAdmin’s perspective, where the zone is (e.g. Building 1).
- In Display name, type a name that makes it easy for the users to know where the zone is (e.g. Main Admin Office).
- Select the IP range you require:
-
All IP addresses - don’t restrict access to print queues based on an IP address. Use this option if you want to allow access to all computers.
-
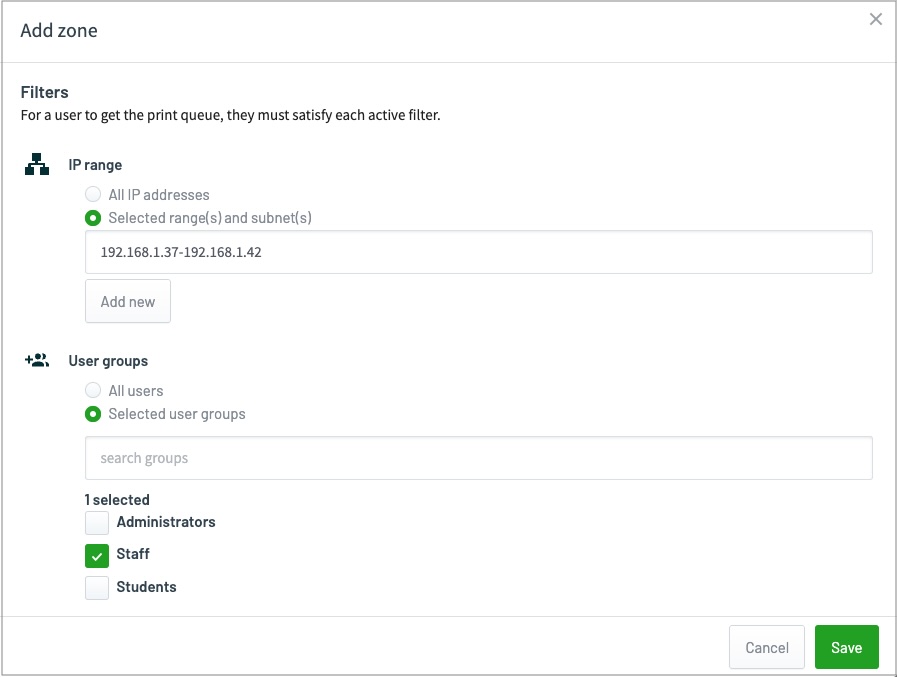
Selected range - specifies one or more IP subnets (CIDR) or IP address ranges. You would use a selected range if, for example, you want to set up a zone for each campus or building, and restrict access to print queues outside of that campus or building.
If you selected Selected range, enter your IP range in one of the following formats:
- CIDR, for example,
10.100.10.0/24 - IP address range, for example,
10.100.10.0-10.100.10.254
- CIDR, for example,
-
- If you want to add multiple IP ranges, click Add new and repeat the above steps.
- Decide which users to include in the zone. Select:
-
All users - all users in PaperCut NG/MF.
-
Selected user groups - Select which PaperCut NG/MF groups you want to include. If you have a long list of groups, use the filter to fine tune it.

-
- Decide which computers to include in the zone:
-
All computers - all computers using Print Deploy.
-
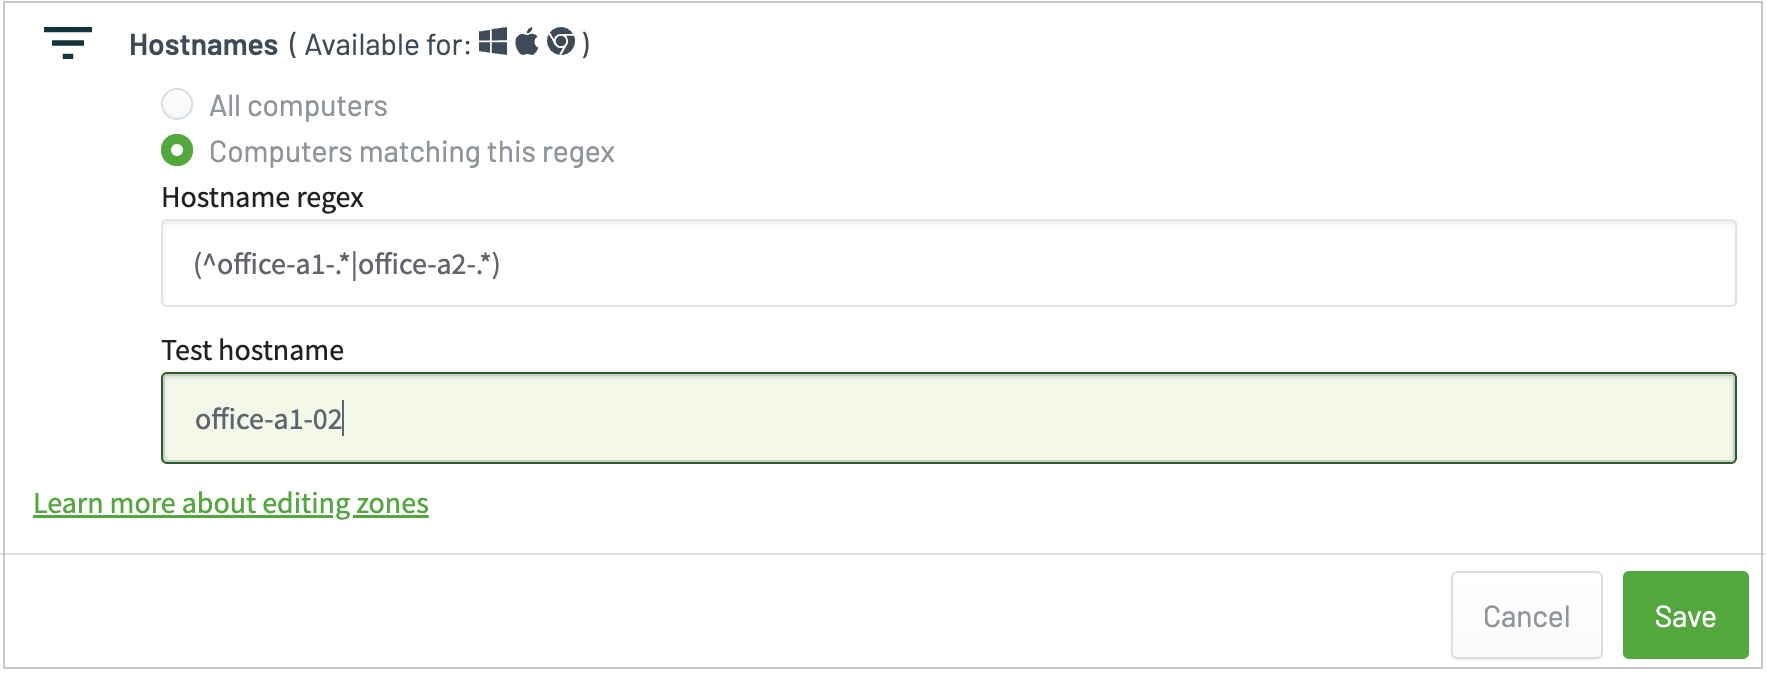
Computers matching this regex - Add a customised regex expression and validate it with the test hostname field. (see below for some examples )

-
- Click Save. Your new zone is added to the list of zones on the Print Deploy page.
Step 2: Connect print queues to a zone
-
Click Zones, then in the Your zones list, select the zone you want to connect printers to.
If you need to add a new zone first, take a look at how to add zones and user groups to Print Deploy .
-
In the Print queues list, select which printers you want to be automatically installed on the users’ computers; then click Connect to zone. They are added to the list of print queues for that zone.
-
If required, add print queues to the zone that you want to make optional for users to install on their computer. They can install them via the Add printers tab in their Print Deploy client.
a. In the Print queues list, select which printers you want to make optional for users to install.
b. At the bottom of the list of printers, select the Optional install checkbox.
c. Click Connect to zone. They are added to the list of print queues for that zone.
What’s next?
(Optional) Deploy print queues to individual clients .
Hostname Regex examples
| Regex expression | Description | Example Matches | Example Non Matches |
|---|---|---|---|
.* | Default expression that matches all computers | All computers | N/A |
laptop | Matches any hostname with laptop anywhere in it | laptop laptop-01 staff-laptop 2020laptop02 | desktop-01 notebook-01 2020lapt02 |
^staff | Matches any hostname starting with staff | staff-laptop staff-desktop staff-johncitizen | laptop-01 john-staff |
(^lab-a1|^lab-a2) | Matches any hostname starting with lab-a1 OR lab-a2 | lab-a1-01 lab-a2-25 lab-a1 | lab-a3-01 floor-01-lab-a101 lab_a1_01 |
^laptop-01$ | Matches one hostname | laptop-01 | All other variants |
(?i)janescomputer | Case insensitive matching allowed | JanesComputer JANESCOMPUTER janescomputer | BobsComputer Janes-Computer |
| ^(computer1|computer2|computer3|computer4)$ | A simple list of computer names | computer1 computer2 computer3 computer4 | J8JBP99 lab_a1_01 |


Comments