The client software is optional and not required for basic logging, however, it does provide users with access to advanced features. These features include:
-
Real-time feedback to the user including their account balances and event messages such as “print job denied” reasons.
-
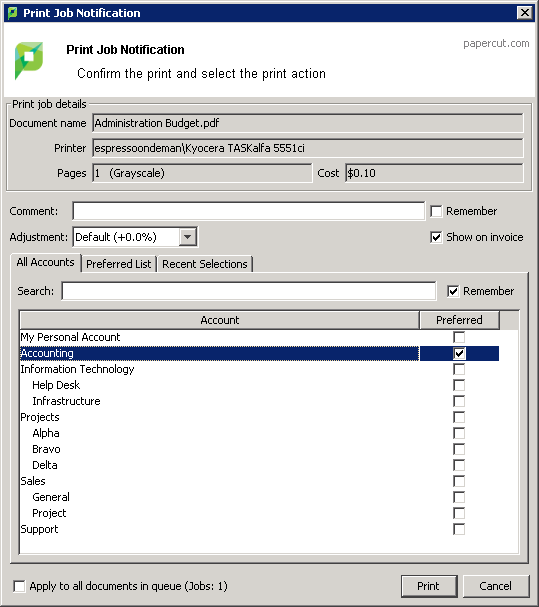
Access to the account selection popup so users can allocate print jobs to shared accounts - for example, accounts representing departments, projects, clients, etc. This is particularly important in a business environment.

Demonstrating the client software and account selection process
Create a shared account
-
Click the Accounts tab.
The Shared Account List page is displayed.
-
In the Actions menu, click Create a new account.
The Account Details page is displayed.
-
Enter an appropriate name for the account. For example, “test account”.
-
Click Apply.
-
Select the security tab and ensure the
[All Users]group has access to the account. If not, add the group by selecting it from the list; then clicking Add. -
For more information about creating and managing shared accounts, see Shared accounts .
Grant account selection access to your account
-
Click the Users tab.
The User List page is displayed.
-
Select a user.
The User Details page is displayed.
-
In the Account Selection area, select the Show advanced account selection check box.
-
Click OK.
Launch the client software (Windows)
-
Log in to a workstation using your user account as modified above (note: The server itself can also be used for this testing if desired)
-
Open Windows Explorer (File Explorer).
-
In the address bar, enter
\\server_name\pcclientwhere"server_name"is the name of the server hosting the PaperCut NG/MF software. This brings up files located on thePCClientshare. -
Launch the
pc-client.exeprogram by double-clicking the file. An icon is displayed in the task tray. -
Print a test page (for example, a web page). The advanced client popup is displayed allowing you to select the “test account” set up in the preceding section.
For more information about shared accounts, see Shared accounts . For more information about client software deployment, see User Client .


Comments