Installing an IPPS printer in Windows
Last updated March 18, 2025
Since version 18.1 PaperCut NG/MF supports IPPS printers. Printing via IPPS (i.e. IPP over HTTPS) ensures that print traffic to the printer is encrypted. This article focuses on the steps required to add an IPPS printer on a Windows Print Server, and to use that IPPS printer in PaperCut.
Installing an IPPS printer in Windows
Firstly, to set up printing from a Windows print server to an IPPS printer, the printer’s SSL certificate will need to be installed on the server. Follow the printer’s own manual for details on how to retrieve or create an SSL certificate on the printer.
Below is an example of a printer with an existing self-signed certificate.
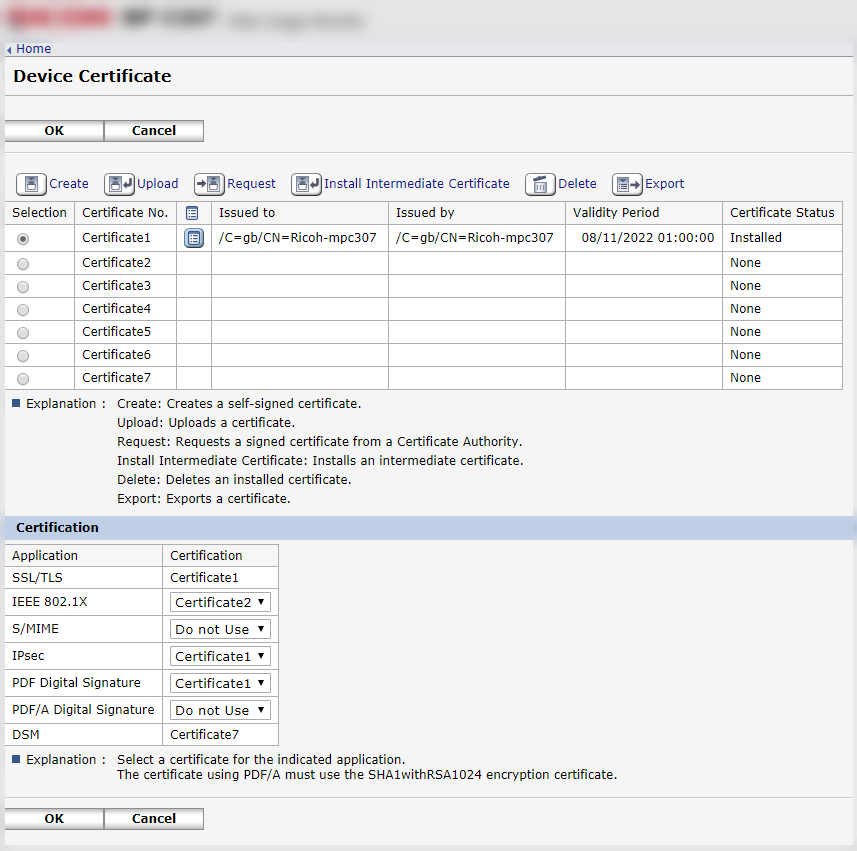
Download the certificate onto the print server, and double-click on it.
Add the certificate to the ‘Trusted Root Certification Authorities’ certificate store.
If the certificate is a self-signed certificate, also add the certificate to the “Third-Party Root Certification Authorities” certificate store.

Make sure your certificate is installed correctly by clicking on the Certification Path tab:

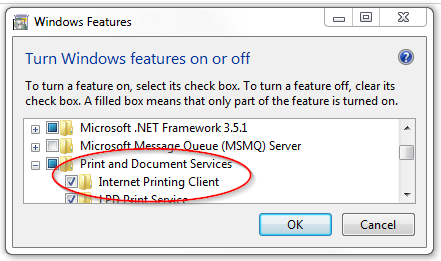
Ensure Internet Printing Client is enabled on your server via Windows Features in the Control Panel.
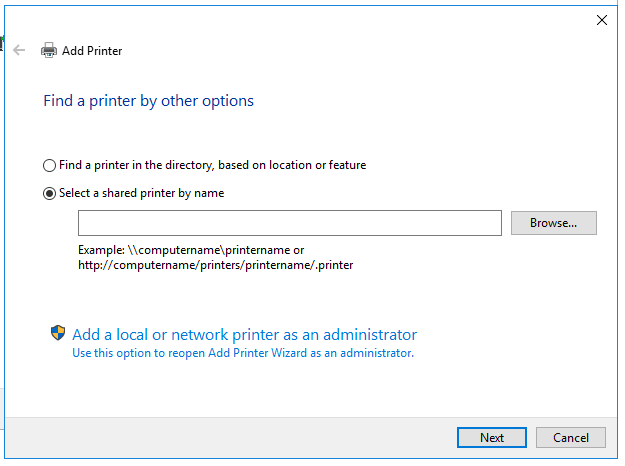
Now add the printer and select the “Add a local or network printer as an administrator” option.
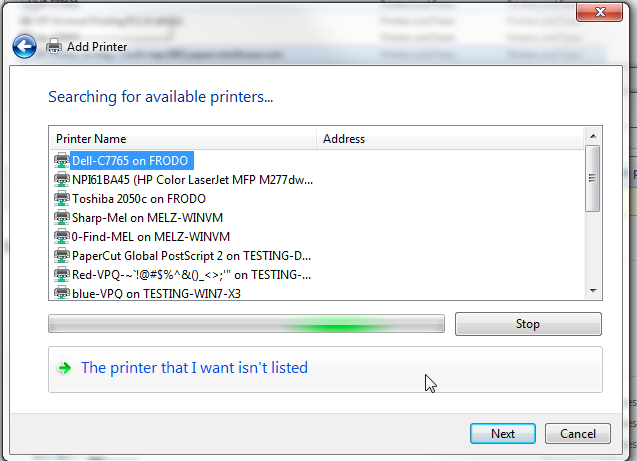
Select the “The printer that I want isn’t listed” button
Select the 2nd option, “Select a shared printer by name” and enter in: https://
:443/printer or: https:///ipp .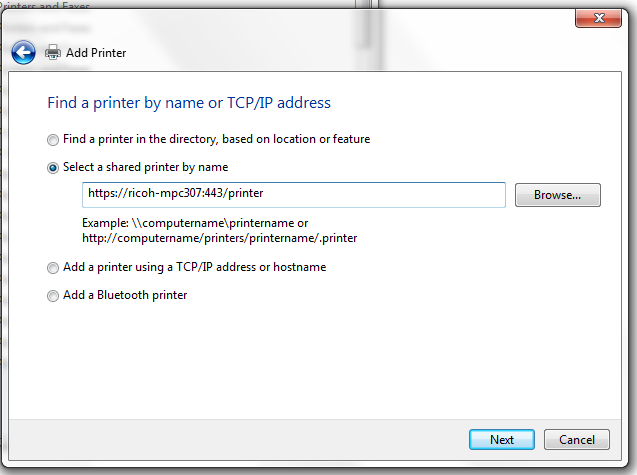
Once added, the printer will appear in the list of available printers. Here are a couple of examples of IPP names that are used for different manufacturers:
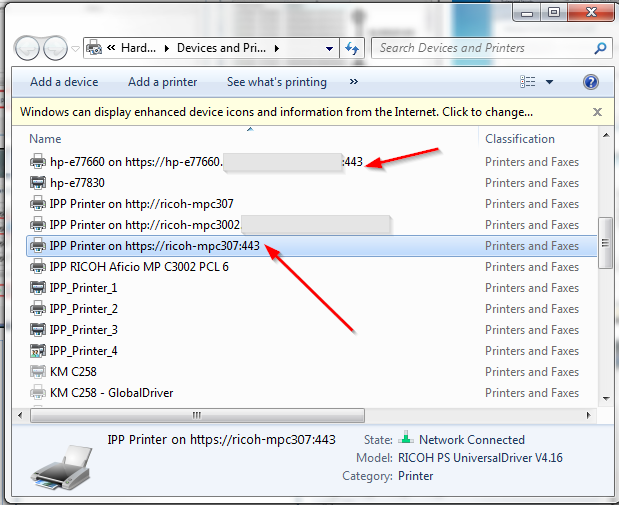
From your print server, check whether you can successfully print to the printer. At this stage PaperCut NG/MF is not involved yet, you are just checking whether the certificate was correctly loaded and the printer was correctly installed.
Once you have setup your IPPS printer, you can validate that print jobs are encrypted by following this external guide.
IPPS printers in PaperCut NG/MF
Prepare
Before you can ‘Track and Control’ IPPS print queues in PaperCut, the PaperCut Print Provider service needs to be run using an account with local administrator privileges on the print server.
- Navigate to Control Panel → Administrative Tools → Computer Management → System Tools → Local Users and Groups and create a new local user account with administrator level access.
- Enable the option Password never expires.
- Navigate to Control Panel → Administrative Tools → Services →
- Right-click on PaperCut Print Provider → select Properties→ navigate to the “Log On” tab.

- Select the option Log on as: “This account:”
- Enter the credentials for the newly created account.
- Click OK.
- Restart the service.
Configure
Note - the IPPS printer shouldn’t be shared directly to users. Instead you need to set up another queue (a Find-Me virtual queue) that can be shared with your users, and print jobs from that virtual queue can then be redirected to the IPPS queue.

Why can’t I just share the original IPPS printer you ask… well firstly, Windows will block the sharing of an IPPS printer. Secondly, even if you are clever enough to hack it to share the printer, due to optimisation of network printers in a Windows environment it will bypass the server and will send the spool file directly to the printer. If that happens then PaperCut won’t be able to track the print jobs.
To help you ensure that PaperCut NG/MF tracks every IPPS job, we’ve introduced an additional feature in Version 18.1 to only make non-shared IPPS printers visible in the PaperCut admin web interface.
NOTE: You will never see IPP printers in the PaperCut admin web interface, only non-shared IPPS printers will be made available.
Once you can see your IPPS printer in PaperCut, configure it as a destination queue in your Find-Me printing configuration.
Troubleshooting
You can use Wireshark to analyse network protocols to check for secure IPP traffic. For instructions on how to use Wireshark, follow this guide.
The end-to-end print security guide is a great source of information about how to protect print traffic between workstations and the print server, and also describes other measures to put in place in order to make your print environment more secure.
If this error occurs whilst adding a printer:
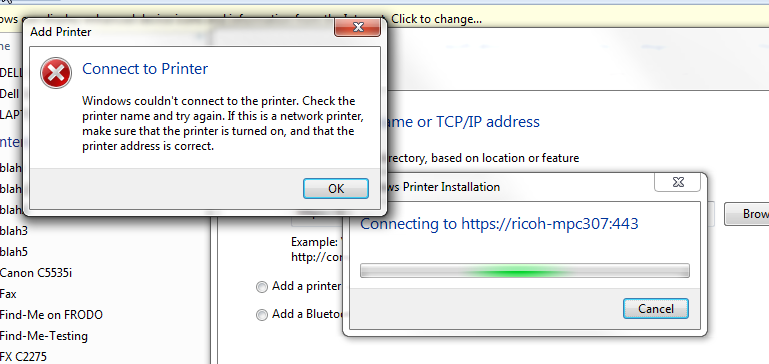
Check whether IPPS is enabled on the device. On some devices IPPS is off by default.
Try restarting the Print Spooler service on the print server.

Add the certificate to the “Third-Party Root Certification Authorities” (follow steps outlined in steps 1, 2, 3 at the start of this article).
Check to see if you need the FQDN of the device (e.g. hp-m4555.mycompany.com), rather than just the hostname (hp-m4555) when adding the device. You can check this by viewing the host name when sending a ‘ping’ to the device in the Command Prompt terminal.
PaperCut logs the print, but nothing prints out
If you print a test page and PaperCut NG/MF logs the print job, but you do not get a physical print out at the printer, then it could be that the PaperCut Print Provider service account does not have sufficient privileges. Follow the guide that was detailed in the article above to ensure that the Print Provider is running as a user account with local administrator level access on the print server.
The print comes out, but PaperCut does not log it
If you are printing successfully but find that your Job Log in PaperCut does not show a record of the jobs, ensure that you have set up a virtual queue that redirects to the IPPS printer and are not printing to the IPPS printer directly instead.
Known Limitations
The following is not supported for IPPS printers:
- Printer status display
- Blocking the release of jobs when an IPPS printer is in error on the following release stations: Standard Release Station, web release stations (Web Release, Admin Web Interface, User Web Interface, Mobile Print Release, Unix command-line Release Station client).
- Validating page counts using hardware checks
Categories: How-to Articles , Print Queues
Keywords: ipps , security , encryption , end-to-end encryption , ipp protocol , secure ipp , tls


Comments