The User web interface displays information about the user’s account and provides access to features such as TopUp/Pre-Paid Cards. You can tailor the visual design of these pages to make them fit into the look and feel of your internet or intranet site.
Change the branding of the User web interface
Click the Options tab. The General page is displayed.
Scroll to Branding > User web interface section.
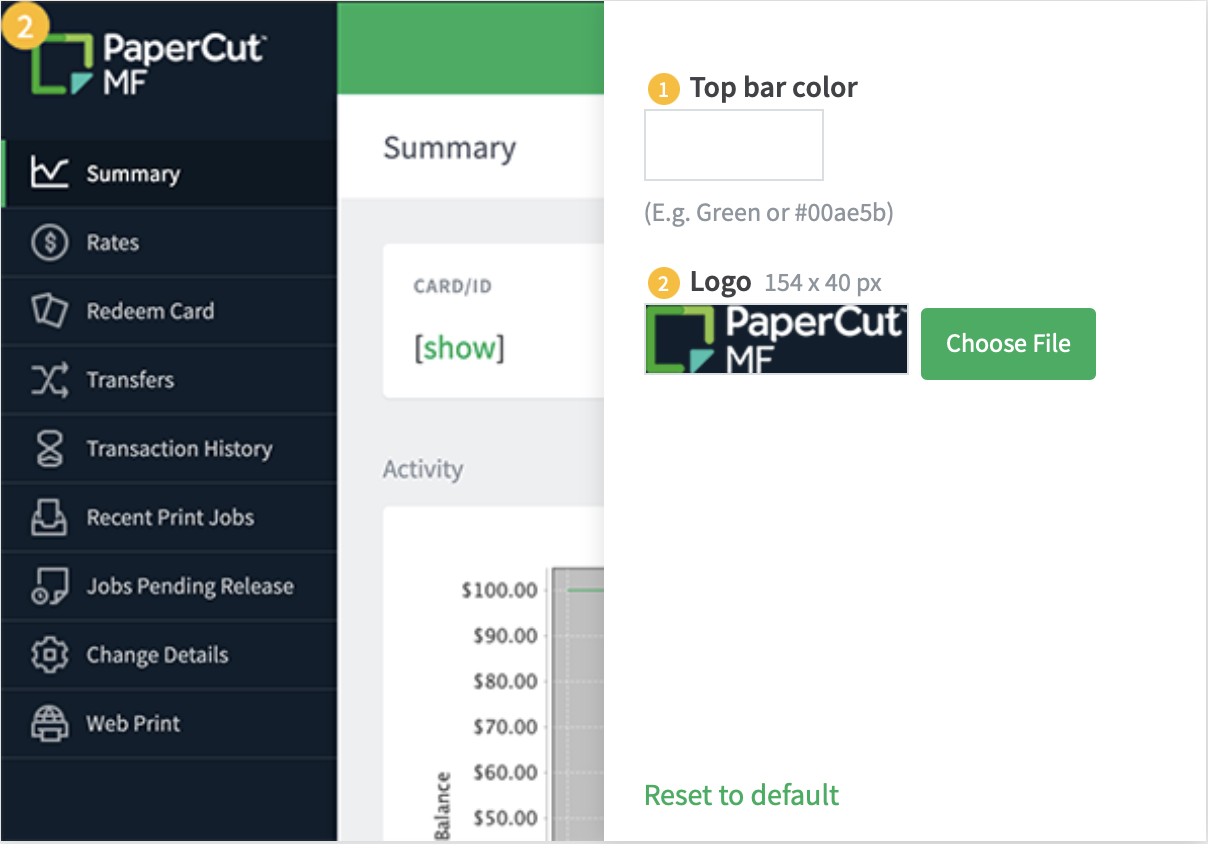
Screenshot of the ‘User web interface’ branding section
To change the header’s background color:
- In Background color, enter the name of the required color or its hexadecimal value
#RRGGBB. e.g. green or#00ae5b.
- In Background color, enter the name of the required color or its hexadecimal value
To change the header logo:
- Click Choose File next to Logo; then locate the header logo image file. The image must be in PNG format and for best results should be sized 154px x 40px.
Click Apply.
The changes are reflected on the User web interface.
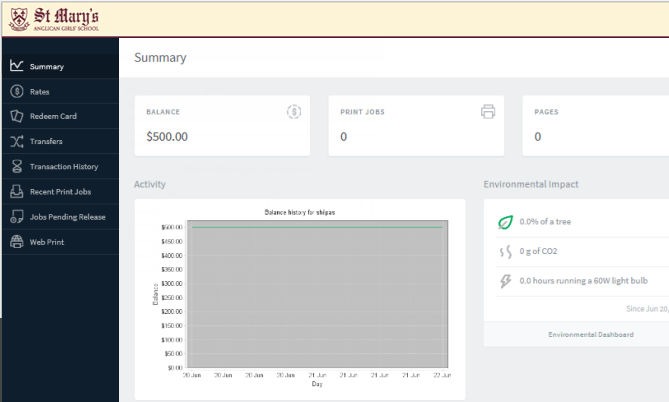
Screenshot of a customized User web interface with a custom logo and color
Additional links in the navigation menu
The navigation menu in the user web interface contains links for the PaperCut services that are enabled and available to the user. In some cases, you might want to add additional external links to this menu. Examples include:
- Linking to a print policy page on the organization’s intranet.
- Linking to a page with key contact details.
- A link to return to the “main” intranet page/portal.
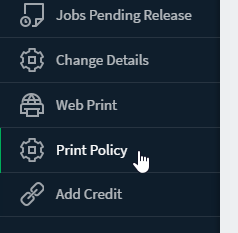
Custom links are displayed above the Log Out item.
Add a custom link
Click the Options tab. The General page is displayed.
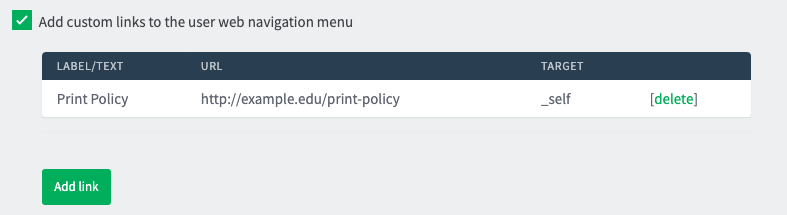
In the User Features area, select the Add custom links to the user web navigation menu check box.
Click Add link.
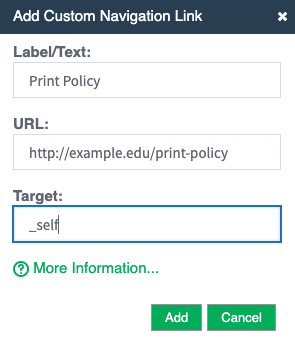
Complete the following fields:
- Label/Text—the text that is displayed in the navigation menu.
- URL—the destination of the URL when clicked.
- Target—the destination where the linked URL will be displayed. For more information about target values, visit
w3schools targets page
.
- One common example is to specify
_selfas the target. This setting means clicking the link will no longer launch a new tab, but will launch the link in the same tab._blankwould tell it to launch the link in a new tab or window.
- One common example is to specify
The link is now displayed in the User interface.
Existing custom links are displayed in the Admin web interface under the Add custom links to the user web navigation menu check box. To delete a link, click the [delete] link next to the relevant link.
The URL in custom navigation links can also contain special replacement fields. E.g. the %user% in http://example.edu/print-policy?u=%user% is replaced with the logged in username to create a URL such as http://example.edu/print-policy?u=tom.
The available special replacement fields are as follows:
Fields available for replacement in custom navigation links in the user web interface
| Field | Description |
|---|---|
%user% | The username of the logged in user. |
%user_full_name% | The full name of the logged in user. |
%user_id% | The id/card number of the logged in user. |
%user_email% | The email address of the logged in user. |
%user_office% | The office of the logged in user. |
%user_department% | The department of the logged in user. |
%return_url% | A URL that sends the user back to the user web interface. The user is sent back to the Summary page as if they had just logged in, assuming their session has not timed out. |
Custom printer maps for Web Print
You can use a graphical map or other custom content instead of the default printer selection list in the Web Print wizard. For more information see Create a Web Print printer map or custom printer list .
Advanced Customization
The design of the User web interface is controlled via HTML “include” files for the header and footer areas of the page, with page styling controlled via Cascading Style Sheets (CSS). Placing the following files in the PaperCut NG/MF directory structure at [app-path]/server/custom/web supersedes User web interface customizations in the Options > General > Branding section of the Admin web interface.
User web interface customization files
| Filename | Description |
|---|---|
user3.css | If this file exists, the contents of user3.cssis included as an overriding stylesheet. Use the styles in this file to define fonts, colors and sizes.
NOTE: The number in this file has been incremented from versions prior to 17.2. |
header3.inc | If the header include file exists, the HTML in the header area of the pages is replaced with the contents of the file. Save this file in UTF-8encoding for international characters to be displayed correctly.
NOTE: The number in this file has been incremented from versions prior to 17.2. |
footer3.inc | If the footer include file exists, the HTML in the footer area of the page is replaced with the contents of the file. Save this file in UTF-8encoding for international characters to be displayed correctly.
NOTE: The number in this file has been incremented from versions prior to 17.2. |
Example Customization Scripts
Want to customize the user web interface? Here are some example JavaScript snippets to help you get started. Many of these use jQuery, so you may find the jQuery documentation useful for further customization.
To apply these changes, add the script to the footer3.inc file. Once saved, refresh your browser to see the updates.
Change a navigation menu label
This example script shows how to change the Redeem Card menu item to Activate Card instead:
<script type="text/javascript">
  $(function() {
    $('#linkUserTopUpCards').text('Activate Card');
  });
</script>
Add text to a page
This example script lets you add additional text to a particular page. The script below adds additional help text specifically to the Transfers page.
<script type="text/javascript">
  $(function() {
    if ($('#main h1').text() == 'Transfers') {
      $('#main h1').after("<p>Enter the receiving user's login name in 'Transfer to user'.</p>");
    }
  });
</script>
Hide table columns
Use this example script to hide particular columns from a table on one of the pages - for example the printer names.
<script type="text/javascript">
  $(function() {
    $('th.accountNameColumnHeader').hide();
    $('td.accountNameColumnValue').hide();
    $('th.printerDisplayNameColumnHeader').hide();
    $('td.printerDisplayNameColumnValue').hide();
  });
</script>
Hide print job costs
Use this example script to hide the print job costs from the Recent print jobs page:
<script type="text/javascript">
$(function() {
  //If the title of the page is 'Recent Print Jobs'
  if (document.title.includes('Recent Print Jobs')) {
   //For each print job for current user
   $('table.results td.usageCostColumnValue').each(function() {
      // remove the cost from each row of the usage table
      //$(this).closest('tr').find('td.statusColumnValue a:contains(request refund)').closest('td').remove();
      $(this).text('');
   });
  }
});
</script>
Hide a navigation item
This example will move the Recent Print Jobs menu item from the list:
<script type="text/javascript">
  $(function() {
     // Removing the Recent Print Jobs link from the navigation menu
 $('#linkUserPrintLogs').remove();
 });
</script>
Change the order of the navigation items
This example script will move Web Print menu item to the top of the list.
A better way to do this is to change the initial page shown after the user logs into the User Web Pages, through the admin interface: Options → General → User Features → Initial page displayed after successful login.<script type="text/javascript"> $(function() { // Change the name below to match the link you'd like to put on the top var LINK_TO_MOVE = "Web Print"; var $navList = $('div#nav').find('ul'); var $linkToMove = $navList.find(":contains('" + LINK_TO_MOVE + "')").parents('li'); $navList.prepend($linkToMove); }); </script>Alternately the example below will change order of the navigation menu links using the link IDs. This will move the Jobs Pending Release link below the Summary link.
<script type="text/javascript">
 $(function() {
  $('#linkUserReleaseJobs').parents('li:first')
                           .remove()
                           .insertAfter($('#linkUserSummary').parents('li:first'));
  });
</script>
Hide the server-name from the printers list in Web Print
Some customers want to hide the server name in from the Web Print printer list because they don’t want users to see the server name.
<script type="text/javascript">
  $(function() {
    $('.web-print-printer-list td.displayNameColumnValue label').contents().filter(function() {
	  // text nodes only (so as to avoid selecting the radio button)
      return this.nodeType == 3;
    }).each(function() {
	  var text = $(this).text().trim();
	  // There is a text node before the radio button. Ignore it.
	  if (text.length > 0) {
	    var printerName = text.substring(text.indexOf('\\') + 1);
		$(this).replaceWith(printerName);
      }
    });
  });
</script>
Remove user balance and balance graph
If you’re wanting to hide the balance and the balance graph.
<script type="text/javascript">
  $(function() {
    // check that we're on the Summary page
    if ($('#main h1:eq(0)').text() == 'Summary') {
      // hide the current balance display (blanks out the second row in the table)
      $('table.userDataTable tbody tr:eq(1) th').text("");
      $('table.userDataTable tbody tr:eq(1) td').text("");
  // remove the activity heading and balance graph (hides the second heading and following section on the page)
  $('#main h2:eq(0)').next().hide();
  $('#main h2:eq(0)').hide();
}
 });
</script>
Disable ‘refund request’ for print jobs based on server
In a multi-tenancy scenario, some customer may be interested in disabling the refund request links for jobs sent via selected servers.
<script type="text/javascript">
 var disableRefundOnServers = [
  //Create a collection of servers to disable the refund request option for
  'marketing-server',
  'science-server'
 ];
$(function() {
//If the title of the page is ‘Recent Print Jobs’
if ($(’#main h1’).text() == ‘Recent Print Jobs’) {
//For each printer display name column in the data table
$(’table.results td.printerDisplayNameColumnValue’).each(function() {
//Use string functions to extract the printer name
var printerFullName = $(this).text().trim();
var serverName = printerFullName.substring(0, printerFullName.indexOf(’\’));
//If the printer name is in the collection of servers to disable links for
if ($.inArray(serverName, disableRefundOnServers) >= 0) {
//Traverse up and down the DOM for the table to find the refund link and remove it
$(this).closest(’tr’).find(’td.statusColumnValue a:contains(request refund)’).closest(’td’).remove();
}
});
}
});
</script>
Comments